Embarking on the journey to dental implants can be a transformative experience, offering a permanent solution for missing teeth and restoring both oral health and confidence. This step-by-step guide aims to provide valuable insights for individuals in Oakville considering Dental Implant Near Me in Oakville services, outlining the process and highlighting the importance of finding an Affordable Dentist Near Me for a seamless and accessible experience.
Step 1: Initial Consultation with an Affordable Dentist Near Me:
The journey begins with an initial consultation with an Affordable Dentist in Oakville. During this comprehensive appointment, the dentist will assess your oral health, discuss your specific needs, and determine if you are a suitable candidate for dental implants. This is an opportune time to address any questions or concerns you may have about the procedure.
Step 2: Treatment Planning and Customized Solutions:
Following a thorough assessment, the dentist will create a personalized treatment plan tailored to your unique oral health needs. This plan includes details about the number of implants required, the choice of implant material, and any additional procedures, such as bone grafting, if necessary. Clear communication ensures that you have a complete understanding of the proposed treatment.
Step 3: Preparing for the Dental Implant Procedure:
Before the implant procedure, the Affordable Dentist Near Me will provide guidelines on pre-operative care. This may include recommendations on medications, dietary restrictions, and any necessary preparations to ensure a smooth and successful implant placement.
Step 4: Dental Implant Placement:
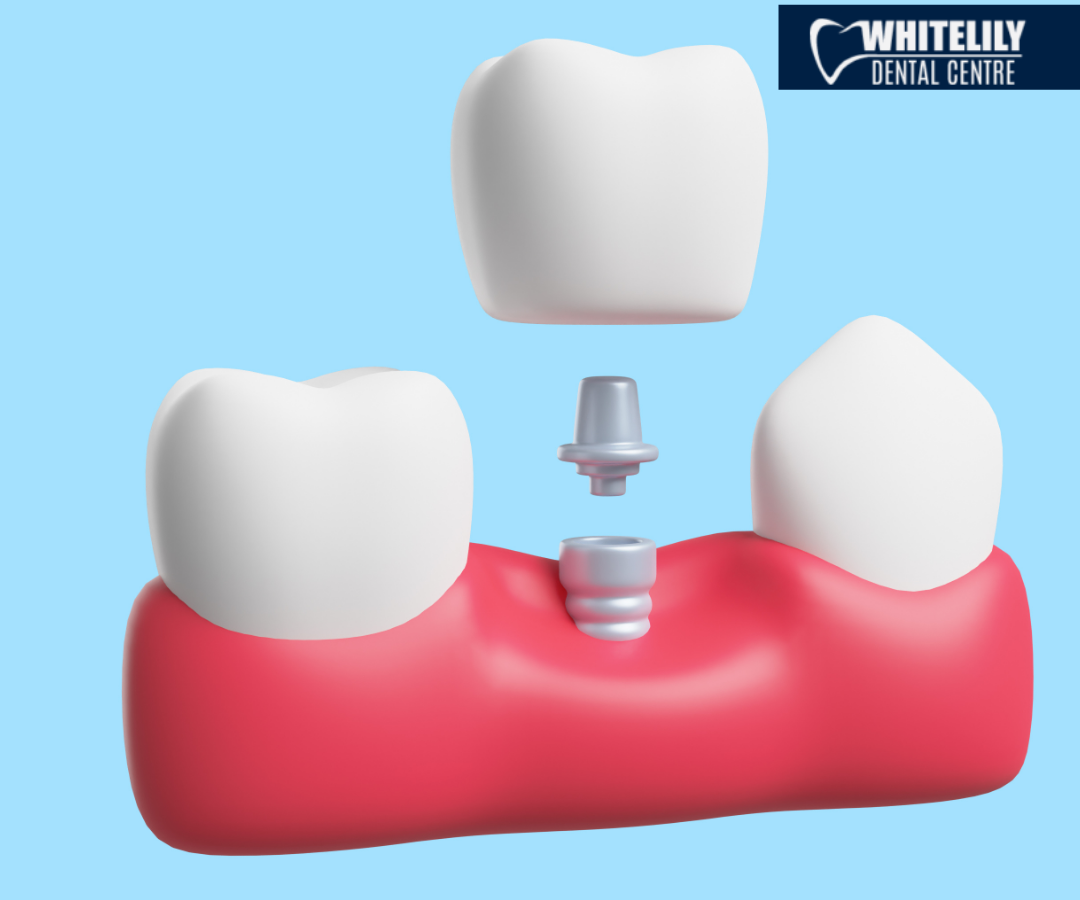
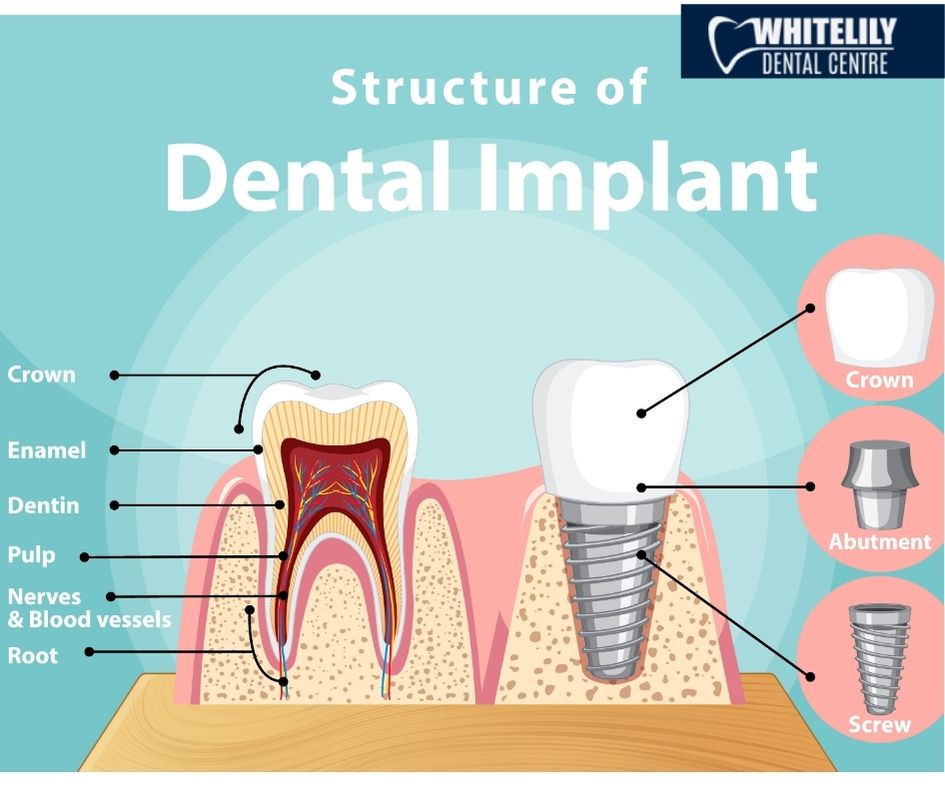
The actual implant placement is a surgical procedure performed by the dentist or a specialist. The dentist will carefully insert the titanium implant into the jawbone beneath the gum tissue. The gum tissue is then stitched back into place, allowing the implant to bond with the bone over the healing period. Depending on the complexity, this process may take several months.
Step 5: Abutment Placement:
Once the implant has fused with the jawbone and the gum has healed, the next step involves attaching an abutment to the implant. The abutment is a post that connects the replacement tooth (crown) to the implant. In some cases, the abutment placement may be combined with the initial implant surgery.
Step 6: Custom-Made Replacement Tooth:
After the abutment is in place, the dentist will create a custom-made replacement tooth, often referred to as a crown. The crown is designed to match the color, shape, and size of your natural teeth, ensuring a seamless and aesthetically pleasing result.
Step 7: Follow-Up Care and Regular Checkups:
Following the completion of the dental implant procedure, it’s crucial to adhere to post-operative care instructions provided by the dentist. Regular checkups will be scheduled to monitor the healing process, assess the stability of the implant, and make any necessary adjustments to ensure optimal results.
Choosing the Right Affordable Dentist Near Me for Your Dental Implants:
Finding the right dentist for your dental implant journey is paramount. Look for an Affordable Dentist in Oakville who prioritizes patient education, offers transparent cost breakdowns, and provides flexible payment options to make dental implants accessible to a broader range of individuals.
Conclusion:
Embarking on your journey to dental implants involves careful planning, personalized treatment, and the expertise of an Affordable Dentist Near Me. By following this step-by-step guide, individuals in Oakville can navigate the process with confidence, knowing that they are on the path to a restored smile and improved oral health. Remember, the journey to dental implants is an investment in a brighter and more confident future.


